
Made in America

Get Connected With

JointsCouplings.com White Logo

Opening Hours M-F: 07:00 AM to 4:00 PM (PST)

What Are Resin Insects and How Are They Made?

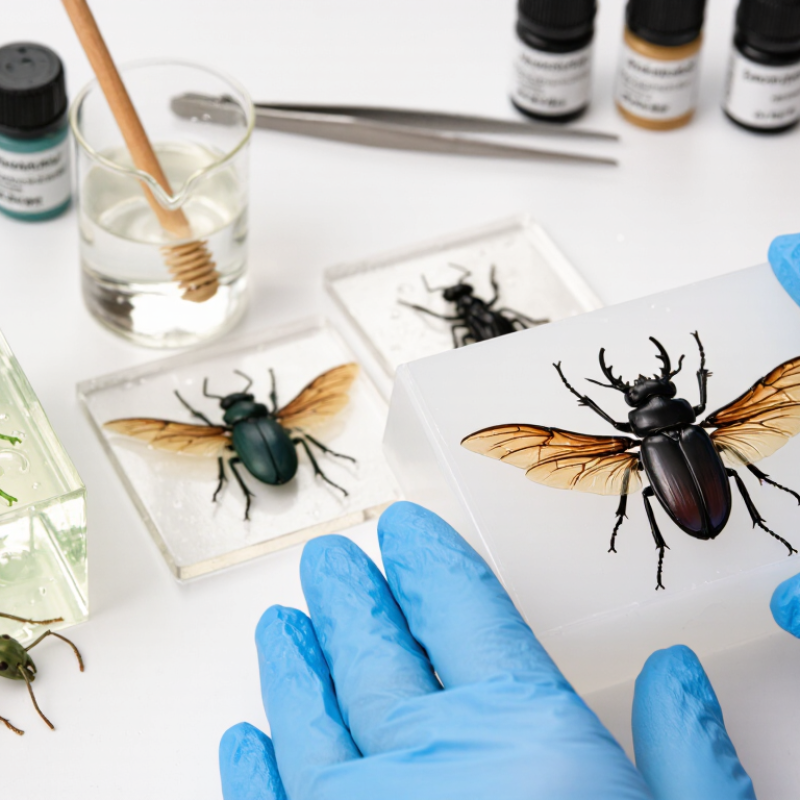
Resin Insects are small objects that preserve the delicate shape of an insect inside clear, hardened resin. Some contain ethically sourced specimens; others use carefully sculpted or printed models. The distinction matters. A real wing may show tiny veins, while a replica offers more control over color and pose. Both can become striking display pieces, but neither is simply an insect dropped into a cup of liquid.

Making one usually involves selecting a clean, dry specimen or model, positioning it in a mold, and adding resin in measured layers. Each step affects the result. A trapped bubble can cloud a clear body, and a leg may shift while the resin is still fluid. Slow down. Makers often test small pours first, since resin brands differ in mixing ratios and curing times. Following the manufacturer’s instructions is essential; gloves, eye protection, and good ventilation help reduce exposure during handling. Keep uncured material away from children and pets.

This guide explains what Resin Insects are, which materials and tools are commonly used, and how the basic casting process works. It also looks at finishing, common flaws, and practical safety choices. The process can be satisfying, though it is not always as neat as photographs suggest. A slightly uneven result may teach more than a perfect-looking tutorial.
What Are Resin Insects and How Are They Made?

What Resin Insects Are and How They Preserve Specimens

Resin insects are real insect specimens embedded in a clear polymer block. The casting makes wings, legs, and other details visible from several angles. It can also reduce handling and shield the specimen from dust. That is physical protection, not a guarantee that the insect will remain unchanged. Colors may fade, and poorly dried specimens can discolor or develop bubbles.

Preparation affects the result. The insect must be dry, positioned carefully, and surrounded by resin without trapping air. Many makers pour in layers, allowing the first layer to support the specimen before adding more. A 2024 epoxy-resin market report from Grand View Research valued the global market at USD 13.5 billion in 2023; this figure describes material demand, not the longevity of insect specimens. That distinction matters. Clear resin can yellow or scratch over time, so it should not be treated as museum-grade preservation without testing. Uncured resin also requires careful handling, ventilation, and protective equipment. The finish may look flawless, while a tiny bubble near a wing tells a less perfect story.

What Are Resin Insects and How Are They Made?

Resin insects are insect specimens embedded in clear casting resin for display. Specimens are typically dried and prepared before being cast; the resin encases them and makes their features visible.

Adult body lengths are approximate ranges; bars show each range’s midpoint. Insects vary in size, and careful drying helps reduce deterioration after casting.

Materials and Tools Used to Make Resin Insects

Resin insects need a few dependable materials, not a crowded workbench. Use a clear casting resin with its matching hardener, and check the product instructions for the correct mixing ratio and curing conditions. A digital scale helps measure accurately; clean, disposable cups and flat mixing sticks make blending easier. Small silicone molds are useful because cured pieces usually release without much force. Keep nitrile gloves and eye protection nearby, and work with good ventilation. Resin can irritate skin, so avoid direct contact.

For placing the insect, fine tweezers and a toothpick offer more control than fingers. A preserved specimen should be completely dry; moisture can create cloudy patches or bubbles. Pour a thin base layer, let it thicken slightly if the instructions allow, then position the insect before adding resin in stages. Slow, careful pours help reduce trapped air. A small flashlight can reveal bubbles along the wings or legs. They are easy to miss.

After curing, fine-grit sandpaper can smooth sharp edges, though sanding may dull the surface and create dust. Wear a dust mask and clean the piece gently. One detail worth reconsidering: a perfectly centered insect may look less natural than a slight turn of the body. Test the layout with a dry mold first; even careful tools cannot make every placement feel right.

Preparing an Insect for Resin Casting

Preparing an insect for resin casting starts with choosing a clean, intact specimen. Use an ethically sourced insect, and avoid anything damp or visibly damaged. Moisture can cloud the resin or cause decay inside the finished piece. It is easy to underestimate this risk. Let the insect dry fully in a sealed container with a drying agent, following the agent’s instructions. Avoid direct heat, which can distort delicate wings and legs. No shortcuts here.

Once dry, handle the specimen gently with tweezers. A soft, dry brush can remove dust; avoid washing it, since trapped water is difficult to spot. Check the wings, antennae, and joints under bright light. If a leg is bent, do not force it into position. Small parts can snap, and a natural pose often looks better than a perfect one. Use a shallow test pour or a small drop of resin to check how the insect sits before committing to a larger mold. I still find this step fiddly: lightweight specimens may drift or turn. Secure the pose carefully, then make sure the surface is free of fibers and debris before casting.

Casting and Curing the Insect in Resin

Casting an insect in resin begins with preparation, not pouring. The specimen must be fully dry; trapped moisture can cloud the casting or create bubbles. Choose a clean, sound insect and handle it gently with tweezers. Small legs and antennae break easily. That part is frustrating.

Work in a ventilated space and follow the resin maker’s safety and mixing instructions. Measure the two components accurately, then stir slowly, scraping the cup’s sides and bottom. A thin first layer gives the insect a stable bed. Let it thicken or cure as directed before positioning the specimen. This helps prevent it from floating. Add resin in shallow layers, especially in a deep mold, since a large pour may heat unevenly.

Use a toothpick to adjust the wings or legs before the resin sets. Pour slowly along the mold’s edge, and inspect for bubbles around the body. A bubble tucked beneath a wing can be hard to remove later. I’ve found that rushing this step usually shows in the finished piece. Cover the mold to keep out dust, then leave it level and undisturbed for the full cure time. Resin can feel firm before it has fully hardened, so patience matters.

What Are Resin Insects and How Are They Made? — Casting and Curing the Insect in Resin
Stage Material or factor Typical guidance Purpose and important notes
Choose a specimen Insect specimen Use a legally obtained, fully dead specimen that is suitable for preservation. Do not trap or kill protected species. Resin casting is intended for prepared specimens, not live insects.
Prepare the specimen Drying and condition The specimen should be thoroughly dry before casting. Moisture can cause cloudiness, bubbles, or deterioration inside the resin. Delicate specimens may need careful handling to avoid damage.
Select the resin Clear casting epoxy Choose a clear resin rated for the intended casting depth and follow its product instructions. Different formulations have different mixing ratios, working times, and maximum pour depths; there is no single ratio suitable for all resins.
Prepare the work area Mold, tools, and ventilation Use a clean, dry, level surface and a mold compatible with the resin. Wear suitable gloves and eye protection, and provide ventilation as directed by the resin safety information. Keep resin away from children and pets.
Mix the resin Resin and hardener Measure and mix precisely according to the manufacturer’s stated ratio and instructions. Incorrect measuring or incomplete mixing can leave the casting soft, sticky, or uncured. Avoid whipping air into the mixture.
Pour the first layer Resin base layer Pour a shallow layer and let it reach the stage recommended by the resin instructions before positioning the specimen. A partially set base can help keep the insect from sinking or floating, though timing depends on the resin and room conditions.
Position the insect Specimen placement Place the dry insect gently with clean tweezers; check its orientation before adding more resin. Small bubbles may cling to legs or wings. A tool can help release them, but avoid damaging the specimen.
Encapsulate the specimen Additional resin layers Add resin in layers when required by the product’s maximum pour depth or the mold design. Deep pours can generate heat during curing. Following the specified layer thickness helps reduce overheating and other casting defects.
Remove surface bubbles Bubble control Use only a bubble-removal method approved for the resin and mold. Excessive heat can damage the insect, deform a mold, or affect the resin. Follow product guidance and never use an open flame around resin.
Allow it to cure Time and environment Leave the casting undisturbed for the full cure time specified by the manufacturer. Cure time varies with resin formulation, casting size, and temperature. A surface that feels firm may not indicate a complete cure.
Demold and finish Finished casting Remove the piece only when it is sufficiently cured; trim or polish edges if needed. Wear eye protection when sanding, and avoid breathing sanding dust. Follow the resin safety instructions for handling and disposal.

Finishing and Caring for a Resin Insect Piece

After the resin has fully cured, inspect the piece under a bright, angled light. Look for tacky patches, dust, bubbles, and sharp edges. Follow the resin’s technical instructions for cure time; room temperature and pour depth can change it. If polishing is needed, wet-sand gradually with fine abrasive, then wipe with a soft, lint-free cloth. Keep water away from exposed insect material. Small scratches matter.

A perfectly glass-clear finish is not always worth chasing. Aggressive sanding can cloud the surface or damage a delicate inclusion, and a slightly uneven edge may be safer to leave alone. Wear gloves while handling uncured resin, and work with suitable ventilation. Once cured, use clean, dry hands or a soft cloth to reduce fingerprints and surface abrasion.

For display, avoid direct sunlight, hot windowsills, and damp storage. Ultraviolet exposure can discolor some resin formulations over time. The Canadian Conservation Institute’s guidance for highly light-sensitive objects sets a limit of 50 lux; this is a useful conservative reference for insect specimens, especially those with delicate color. Check the piece occasionally for haze or yellowing, and photograph it under consistent lighting. That makes gradual changes easier to notice.