
Made in America

Get Connected With

JointsCouplings.com White Logo

Opening Hours M-F: 07:00 AM to 4:00 PM (PST)

How to Use Puff Ink for Screen Printing?

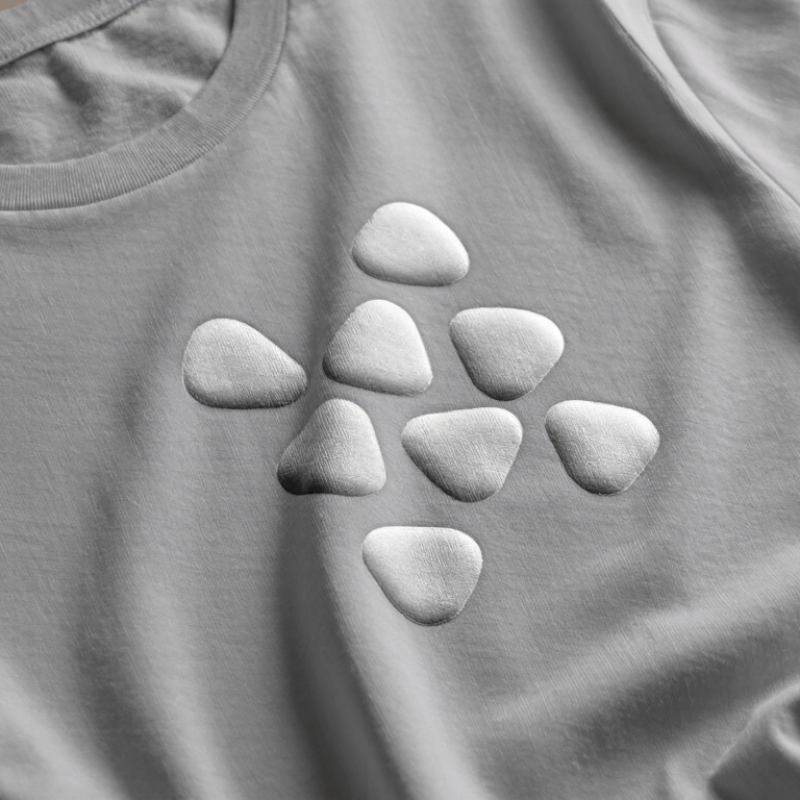
Puff Ink For Screen Printing creates a raised, soft-looking design that stands above the fabric. The effect comes from a heat-activated blowing agent in the ink, which expands during curing. A small chest logo can feel gently embossed; a large print can become a bold, tactile surface. The finish is distinctive. It can also be unpredictable if the ink deposit or curing conditions vary.

This guide explains how to prepare artwork, choose a suitable screen, print an even ink layer, and cure the garment. Fabric choice matters: cotton, blends, and performance materials may respond differently, so test the actual garment before a production run. Use the mesh count and squeegee setup recommended for your ink, and avoid squeezing the print too thin. A sample will tell you more than guesswork.

Curing needs care. Follow the ink manufacturer’s stated time and temperature, and check that the printed layer reaches the required cure—not just that the surface feels dry. A temperature probe or wash test can help reveal problems, though neither replaces the product’s instructions. Too much heat can flatten the puff or damage fabric; too little may leave the print undercured. The balance is not always obvious. Even experienced printers may need a few test prints to dial it in. With measured setup and honest testing, puff ink can produce a consistent raised finish without sacrificing comfort or durability.
How to Use Puff Ink for Screen Printing?

What Puff Ink Is and How It Expands

Puff ink is a screen-printing ink designed to rise when heated. It usually contains a heat-activated foaming agent. During curing, that agent creates tiny gas pockets inside the ink film. The printed area then expands, forming a raised, three-dimensional surface. It feels soft but slightly textured.

Expansion depends on several variables. Ink thickness matters most. A heavier deposit usually produces a taller effect, while a thin layer creates a flatter finish. Mesh count, squeegee pressure, curing temperature, and fabric type also change the result. In my test prints, a dense cotton fabric gave cleaner edges than a loose knit. My first print expanded unevenly because the ink layer was too heavy. That mistake showed me why small test runs are essential.

Use a stable screen and keep the stencil details reasonably open. Very fine lines may lose definition after expansion. Print with controlled pressure, then cure according to the ink supplier’s technical instructions. Too little heat can leave the ink under-cured. Excessive heat may flatten the texture or damage the garment. Check the surface after cooling, not immediately after curing. It can look finished while remaining soft underneath. I also wash-test sample prints, although results can vary between fabrics. The effect is never perfectly predictable. That is part of the craft.

Tools and Materials Needed for Puff Ink Printing

Puff ink needs a stable screen-printing setup, not a complicated one. Gather a screen with mesh suited to the ink’s technical data sheet, a squeegee, scoop coater, ink spatula, and a flat, clean platen. Keep a ruler and thermometer nearby. Mesh count affects deposit thickness, so do not choose it by habit alone; test a small print before production. Grand View Research estimated the global screen-printing market at about US$3.9 billion in 2023, reflecting the method’s continued commercial use. That figure describes the market, not a guarantee that every puff-ink recipe will perform alike.

You will also need puff ink, compatible emulsion, test fabric, masking tape, and a curing unit with reliable temperature control. Use fabric scraps from the actual garment batch: fiber content and fabric color can change the result. A heat gun may help with small tests, but a conveyor dryer or properly controlled flash unit gives more consistent coverage across repeated prints. Follow the ink supplier’s stated curing schedule, and verify fabric-surface temperature with a probe rather than trusting the dryer display. Wear suitable heat-resistant gloves when handling hot samples, and provide ventilation according to the ink’s safety documentation. Keep notes on mesh, squeegee pressure, and cure settings. Small mistakes happen; an uneven puff often means the test was rushed.

How to Prepare the Screen, Ink, and Fabric

Before printing, clean the screen and check it for pinholes or dried ink. A small defect can leave a thin mark across the design. Choose mesh that supports the artwork and the ink’s texture; overly fine mesh may restrict the deposit. Coat the screen evenly with emulsion, let it dry in a dust-free space, then expose and rinse the stencil. I still check the image under a work light. Missed details show up later.

Stir puff ink gently until its texture looks consistent, without whipping in air. Test a small amount through the screen; the deposit should be even, not piled heavily at the edges. Use clean, dry fabric with no lint, wrinkles, or softener residue. Cotton is a practical starting point, but fabric blends can behave differently. Secure the garment flat, and print a test swatch before a full run. A little patience helps.

Allow the print to dry as directed for the ink, then cure it at the specified temperature and time. Use a reliable thermometer rather than guessing from the dryer setting. Too much heat can flatten the raised surface, while too little may leave the print undercured. I have learned that the hard way. Check the result after it cools: the puff should feel raised and remain attached when the fabric is gently stretched.

How to Print a Puff Ink Design

How to Use Puff Ink for Screen Printing?

How to Print a Puff Ink Design

Build the effect with controlled ink deposit, not extra pressure. Start with a clean, dry garment and a screen mesh recommended for the ink system. Print a small test square first. Use a firm, even squeegee stroke, then inspect the wet print for gaps and sharp edges. Too much ink can blur fine details; too little may leave a flat, uneven rise. Keep artwork bold, with open spaces between shapes. Tiny lettering is a gamble.

Flash-dry only as directed, then cure the print evenly. Puff ink expands under heat, so a temperature reading at the dryer’s surface may not reflect the ink film’s actual temperature. Check the ink supplier’s technical data sheet and verify cure with a temperature probe or wash test. AATCC TM135 provides a standardized method for evaluating dimensional change after laundering; it is useful when checking the garment, though it does not certify ink adhesion. FESPA’s 2023 Print Census also identifies quality and production efficiency as important print-business concerns—good reasons to record settings and repeat tests rather than trust a single successful sample.

Tips: Keep a simple job log: mesh, stroke count, flash time, cure settings, and wash result. Let the print cool before judging its final texture. If the puff looks patchy, stop and review the deposit and cure; adding heat blindly can make things worse.

How to Use Puff Ink for Screen Printing? – How to Print a Puff Ink Design
Step What to Do Practical Starting Point Why It Matters
1. Choose the fabric Use a stable, heat-tolerant textile and test the ink on the actual garment before production. Cotton and cotton-rich fabrics are common choices. Check the garment’s care and heat limits. Fabric composition, dye, and finish can affect ink adhesion, color, and curing.
2. Prepare the artwork Create bold shapes with enough open space; avoid very fine lines and tiny enclosed details. Use a simple graphic and review the printed-size artwork before making the screen. Puff ink expands during heating, so small gaps and details may close up.
3. Select the screen Use a screen mesh suitable for depositing a relatively generous ink layer. A lower mesh count is commonly used than for fine-detail designs; choose the mesh based on the ink supplier’s guidance. The deposited ink film helps determine how much the design can expand.
4. Print the design Print an even layer with controlled squeegee pressure and a consistent stroke. Avoid excessive repeated passes. Make a test print and adjust the deposit until the design is even and the details remain legible. An inconsistent or overly thick deposit can produce uneven puffing or loss of detail.
5. Flash, if needed If using multiple colors or layers, flash-dry only as required before printing the next layer. Use the ink manufacturer’s recommended flash procedure and avoid overheating the garment. Excess heat between layers can affect registration, adhesion, or the final raised texture.
6. Cure the ink Cure the print using the ink supplier’s specified time and temperature; verify the ink film reaches the required cure. Do not rely only on the dryer’s displayed temperature. Check the printed ink film with an appropriate temperature-measuring method. Insufficient curing can reduce durability, while excessive heat can damage the fabric or print.
7. Check the result Allow the sample to cool, then inspect the raised effect, edges, adhesion, and fabric appearance. Test a sample before a production run; conduct wash testing according to the intended care instructions. Testing helps confirm that the chosen artwork, ink deposit, fabric, and cure work together.
Important note Puff ink formulations and equipment vary. Follow the ink technical data sheet for mesh, additives, flash conditions, cure requirements, and wash testing. Use suitable ventilation and follow the safety instructions for the products in use.

How to Cure and Check the Finished Print

Curing puff ink takes more care than checking whether the surface feels dry. Follow the ink maker’s temperature and dwell-time instructions, since formulas differ. A heat gun reading can be misleading; measure the ink film itself with a suitable temperature probe. The platen may be hot while the print stays under-cured. Keep the garment moving evenly through the dryer, and avoid crushing the raised surface with excess pressure.

Let the print cool before inspecting it. Look for consistent expansion, clean edges, and a soft, flexible finish. Press lightly with a fingertip. It should not feel tacky or shed powder. Then stretch a hidden section gently and check for cracking or separation. A small test garment is worth the time. Wash it only after cooling fully, following the garment’s care instructions, and inspect it again when dry. I once trusted a smooth-looking print too quickly; the first wash exposed weak areas near the seams. That check is not perfect, but it can reveal problems a quick glance misses. If the puff collapses, flakes, or cracks, review ink deposit, dryer speed, and actual curing temperature before printing the full run.

How to Cure Puff Ink: Temperature Reference

Puff ink must reach the cure temperature specified by its manufacturer. The chart converts example Fahrenheit temperatures to Celsius; it is a conversion reference, not a universal cure recommendation.

Check the finished print: Measure the ink film temperature with a temperature probe or suitable test strips, then inspect the print for even puffing and cracking. Follow the ink’s technical data sheet and test wash durability before production.