
Made in America
Get Connected With



Choosing the right clutch kit 240mm is more than matching a diameter to a vehicle. Diameter is only the starting point.
Automotive educator James D. Halderman offers a useful warning: “Always diagnose the complete clutch system, not only the disc.” His point matters in real workshop conditions. A worn flywheel can ruin a new clutch. Incorrect spline count can stop installation entirely. A release bearing with the wrong contact height may create noise, drag, or incomplete disengagement.
Begin with the vehicle identification number, engine code, transmission type, and production year. Then confirm the disc diameter, spline count, hub profile, cover design, and release mechanism. Some 240mm kits use different pressure-plate loads. That difference affects pedal effort, torque capacity, and daily comfort.
Think about the vehicle’s actual work. Stop-start traffic needs smooth engagement and strong heat resistance. Towing or modified engines may require a higher torque rating. A lightly driven street car often does not need an aggressive racing clutch. More capacity is not always better.
Inspect the flywheel closely. Look for blue heat marks, cracks, grooves, or excessive runout. Replace questionable components. It feels expensive, but repeated removal costs more.
I have seen catalog descriptions appear identical while the release bearing height differed. That small detail caused a frustrating installation. Measurements should beat assumptions.
The best clutch kit 240mm balances fitment, torque handling, pedal feel, durability, and driving conditions. Verify every specification before ordering. A careful choice prevents premature wear and protects the entire drivetrain.
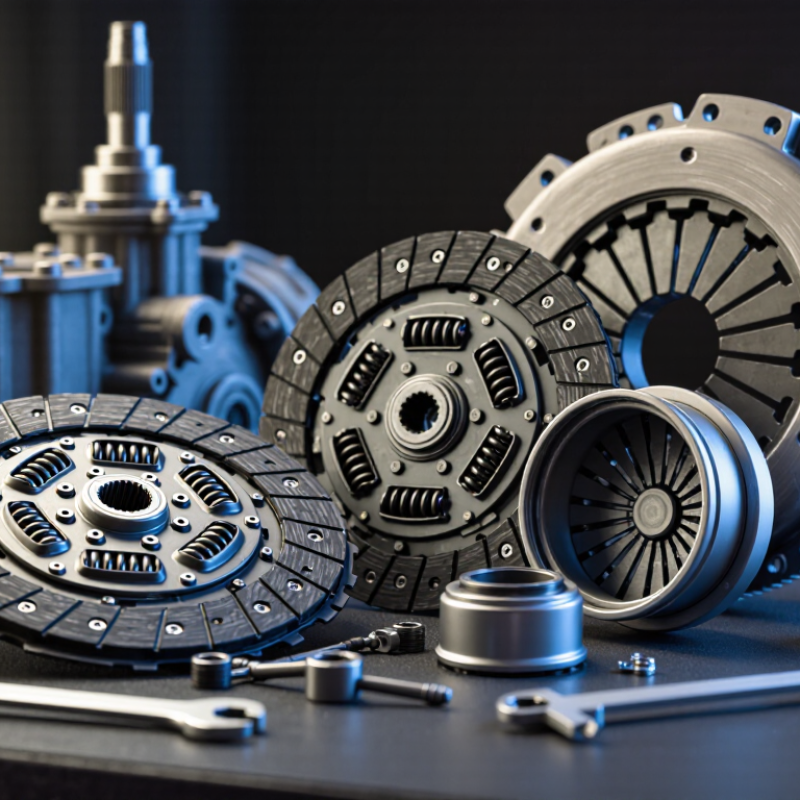
A 240mm clutch kit uses a friction disc with a nominal outer diameter of 240 millimeters. This measurement describes the disc, not the complete kit. The kit usually includes a disc, pressure plate, release bearing, and alignment tool. Some applications also require a pilot bearing. That difference matters.
The disc transfers engine torque through friction. The pressure plate creates clamping force. A larger disc can offer greater friction area and improved heat control, but diameter alone cannot confirm compatibility. The spline count, hub design, flywheel step, bolt pattern, and release mechanism must match the vehicle. Fitment comes first. SAE technical guidance treats clamp load, friction material, and thermal capacity as connected variables, not separate upgrades.
Industry data supports careful replacement decisions. ACEA’s Vehicles on European Roads 2024 report places the average European passenger car age above 12 years, so many vehicles have accumulated repeated clutch wear. IMARC Group’s 2024 market report valued the global automotive clutch market above US$15 billion in 2023. That scale reflects broad demand, but it does not prove every 240mm kit is suitable. I have seen diameter-based choices fail when flywheel height was ignored. Still, catalog measurements can vary slightly. Verify the original part number, measure the flywheel, and compare the manufacturer’s installation specifications before ordering.
A 240mm clutch kit is not automatically suitable because the diameter matches. Check the vehicle’s year, engine code, transmission, and drivetrain layout. The VIN can help confirm the correct application. Compare the original disc’s spline count, hub diameter, and friction surface. A small mismatch can prevent installation.
Inspect the flywheel before ordering. Measure its contact area and check for heat marks, cracks, or deep grooves. The kit should include a pressure plate, clutch disc, release bearing, and alignment tool when required. Confirm the pressure plate’s bolt pattern and release system. Cable, hydraulic, and concentric designs are not interchangeable. In workshop checks, I have seen correct-looking kits fail because the release bearing height was overlooked. That mistake is easy to make.
Tips: Match the kit with the manufacturer’s service data, not only an online photo. Ask a qualified technician to verify torque capacity and pedal compatibility. Keep the old parts nearby during inspection. Compare them twice. If the flywheel is worn, replacing only the clutch may create vibration or slipping. Installation cleanliness also matters; grease on the friction lining can ruin a new disc. Recheck every measurement before purchase, because a confident assumption is still an assumption.
How to Choose the Right Clutch Kit 240mm?
A 240mm clutch kit should match your engine’s torque, driving conditions, and available space. Material choice changes how the clutch feels and survives heat. Organic friction discs usually offer smooth engagement for commuting and moderate towing. Ceramic materials tolerate higher temperatures, but engagement can feel sharper and less forgiving. Sintered options handle severe heat well, although they may increase noise and drivetrain shock. No material is automatically best.
Design details matter just as much. Check the disc’s sprung hub, torsional dampers, spline fit, and friction surface quality. A properly damped hub can reduce vibration during gear changes. The pressure plate should provide consistent clamping force without making the pedal unnecessarily heavy. Measure the flywheel and clearance carefully; “240mm” describes diameter, not complete compatibility. I have seen buyers focus on size and overlook hub offset. That mistake can prevent correct release.
Tips: Compare the kit’s torque rating with your engine’s real output, not an optimistic estimate. Leave a safety margin for towing, hills, traffic, and future modifications. Review heat limits and intended use. A performance rating may reflect short bursts, not daily abuse. Ask for documented testing when specifications seem vague. If engagement becomes harsh, reconsider the material choice rather than assuming stronger means better. Some compromises remain unavoidable.
Choosing a 240mm clutch kit starts with confirming the vehicle’s actual requirements. Measure the existing disc diameter, spline count, hub profile, and flywheel bolt pattern. A 240mm disc may fit the opening but still fail at the center hub or release mechanism.
Check the installation space carefully. Compare the new pressure plate with the old unit, especially around the bellhousing and release fork. Inspect the pilot bearing, release bearing, clutch cable, and hydraulic cylinder for wear or leakage. If the flywheel surface has blue patches, deep grooves, or cracks, replacement or professional resurfacing may be necessary. Do not install new friction parts against a damaged surface.
Clean hands matter.
During workshop inspections, I have seen perfectly matched kits fail because the flywheel was oily or the release bearing was reused. Keep grease away from the friction lining. Use the manufacturer’s torque sequence, tighten bolts gradually, and align the disc before fitting the gearbox. A small alignment error can make installation extremely difficult. It is also worth checking engine and transmission mounts, since excessive movement can create clutch engagement problems. I would not rely only on catalog measurements; photographs, service data, and direct component comparison provide better evidence. Even experienced technicians can overlook a worn pilot bearing when the main parts look acceptable.
| Evaluation Dimension | Typical Reference Data | What to Check Before Purchase | Recommended Action |
|---|---|---|---|
| Clutch Disc Diameter | 240 mm nominal outside diameter; actual measured diameter may vary slightly by application. | Confirm the vehicle or transmission specification and compare the old disc with the replacement disc. | Select a 240 mm kit only when the vehicle application and transmission configuration require this size. |
| Spline Compatibility | Spline count, shaft diameter, and hub profile are application-specific and are not standardized by disc diameter. | Match the disc hub to the transmission input shaft. Do not rely on 240 mm diameter alone. | Use the exact vehicle catalog specification or verify the dimensions with precision measurements. |
| Flywheel Type | Common configurations include solid flywheels and dual-mass flywheels; the clutch kit must match the installed system. | Identify the flywheel type, mounting pattern, friction-surface condition, and whether conversion parts are required. | Do not mix components designed for different flywheel systems unless the complete conversion is specified. |
| Pressure Plate Mounting | Bolt-circle diameter, bolt count, dowel locations, and cover height vary by vehicle application. | Compare the mounting holes and locating dowels with the flywheel before installation. | Reject any kit with an incorrect bolt pattern or cover alignment, even if the disc diameter matches. |
| Engine Torque and Usage | Torque capacity must exceed the engine's peak torque with an appropriate safety margin; frequent towing and stop-start driving increase clutch load. | Consider engine output, vehicle weight, towing frequency, traffic conditions, and any performance modifications. | Choose the specified torque rating for the application rather than selecting solely by disc diameter. |
| Friction Disc Condition | A serviceable disc should have even, dry friction surfaces and securely riveted, undamaged friction material. | Look for oil contamination, glazing, cracked linings, loose rivets, heat discoloration, or worn torsion springs. | Replace the disc if contamination or structural damage is present; identify and repair the source of any oil leak. |
| Pressure Plate Condition | The diaphragm fingers should be even in height, without heavy wear grooves, cracks, or heat distortion. | Inspect the friction face and diaphragm fingers for blue spots, scoring, uneven contact, or weakened spring action. | Replace the pressure plate when wear or thermal damage is visible; resurfacing is not a substitute for a damaged pressure plate. |
| Flywheel Surface | The friction surface should be flat, clean, and free from deep grooves, cracks, and severe heat checking. | Measure for excessive runout and inspect for hot spots, scoring, oil contamination, and uneven wear. | Machine or replace the flywheel only within the manufacturer's allowable specifications and verify the final surface height. |
| Release Bearing | The bearing must match the clutch release system, guide diameter, and operating mechanism. | Check for rough rotation, noise, looseness, grease leakage, and incorrect contact height. | Install a new release bearing with the clutch kit unless the existing bearing is specifically approved and confirmed serviceable. |
| Pilot Bearing or Bushing | Required on applications where the transmission input shaft is supported at the crankshaft or flywheel. | Check the inner diameter, outer diameter, width, fit, and signs of noise or excessive play. | Replace it when worn, dry, seized, or included as part of the specified service kit. |
| Hydraulic or Cable System | Clutch operation depends on correct cable adjustment or hydraulic travel, depending on vehicle design. | Inspect the master cylinder, slave cylinder, hydraulic lines, cable, fork, pivot, and pedal mechanism for leaks or excessive wear. | Repair system faults before fitting the new kit and bleed the hydraulic system where applicable. |
| Installation Tools | Typical requirements include a clutch alignment tool, torque wrench, transmission support, suitable sockets, and cleaning solvent. | Confirm access to safe lifting equipment, correct torque data, alignment equipment, and any application-specific tools. | Do not begin installation without stable vehicle support and the correct tightening specifications. |
| Fastener Installation | Flywheel and pressure-plate fasteners require application-specific torque values and tightening sequences. | Check whether bolts are torque-to-yield, inspect threads, and verify the specified tightening pattern. | Use the prescribed fasteners, tighten in stages and sequence, and never guess torque values. |
| Cleanliness and Lubrication | Friction surfaces must remain dry and free from oil, grease, fingerprints, and anti-seize compound. | Clean the flywheel and pressure plate with a residue-free brake cleaner; lubricate only specified splines and contact points sparingly. | Remove excess lubricant and keep all friction surfaces completely dry before assembly. |
| Post-Installation Check | The clutch should engage progressively without persistent slipping, vibration, abnormal noise, or difficult gear selection. | Verify pedal operation, release travel, hydraulic leaks, gear engagement, and fastener security before road testing. | Perform a controlled road test and follow the kit's bedding-in guidance, avoiding excessive slipping during the initial running period. |
Note: A 240 mm clutch kit is not defined by disc diameter alone. Spline configuration, flywheel type, mounting pattern, release mechanism, and torque requirements must all match the specific vehicle application.
How to Choose the Right Clutch Kit 240mm?
Selecting a reliable 240mm clutch kit starts with compatibility, not appearance. The 240mm measurement describes the friction disc diameter. It does not confirm correct fitment. Check the vehicle’s engine code, gearbox type, spline count, flywheel design, and release-bearing system. A kit should also match the engine’s torque output. Choosing excessive clamping force may increase pedal effort and reduce daily comfort.
The Federal Highway Administration’s 2022 National Household Travel Survey recorded roughly 13,500 miles per vehicle annually in the United States. That mileage can expose weak springs, poor friction materials, and inaccurate machining. For city driving, a progressive engagement pattern usually feels more dependable. Frequent towing or steep-road use demands stronger thermal resistance. SAE technical testing methods also emphasize repeatable friction performance across changing temperatures. Still, published test figures may not reflect your traffic, load, or driving habits. That is where careful judgment matters.
Tips: Compare the kit’s rated torque with your engine’s measured output, not vague marketing claims. Inspect the flywheel for heat spots and cracks before installation. Replace worn hydraulic components when needed. A perfect kit cannot correct a damaged flywheel. Check the warranty terms and installation requirements. Keep the old parts for comparison; they often reveal driving-related wear patterns.